MaxPro Medical
A blood pressure reading can look precise, yet the wrong cuff can quietly distort the number. A cuff that is too small may produce a reading that is higher than your actual pressure; one that is too large may read lower. The difference is not always obvious on the screen. It can be a few millimeters of mercury, or more.
This guide explains how to choose the right cuff size for blood pressure monitor use in 2026. Start by measuring the bare upper arm midway between the shoulder and elbow. Use a flexible tape, keep it level, and note the measurement in centimeters. Then compare it with the cuff’s printed range—not just the monitor brand or the cuff’s appearance. A cuff labeled “standard” may not fit every adult. Check the device manual, too, because compatible cuffs and measurement methods vary.
Small details matter. A sleeve bunched beneath the cuff, a loose fit, or placement over clothing can affect a home reading. Sit quietly, support your arm near heart level, and follow the monitor’s instructions. Even careful technique cannot make every reading perfect. That is worth remembering. Home measurements are useful, but they do not replace professional advice or a properly validated monitor. If your readings differ sharply from those taken in a clinic, bring your device and measurement log to a healthcare professional. A fitting cuff is a practical starting point—not a diagnosis.
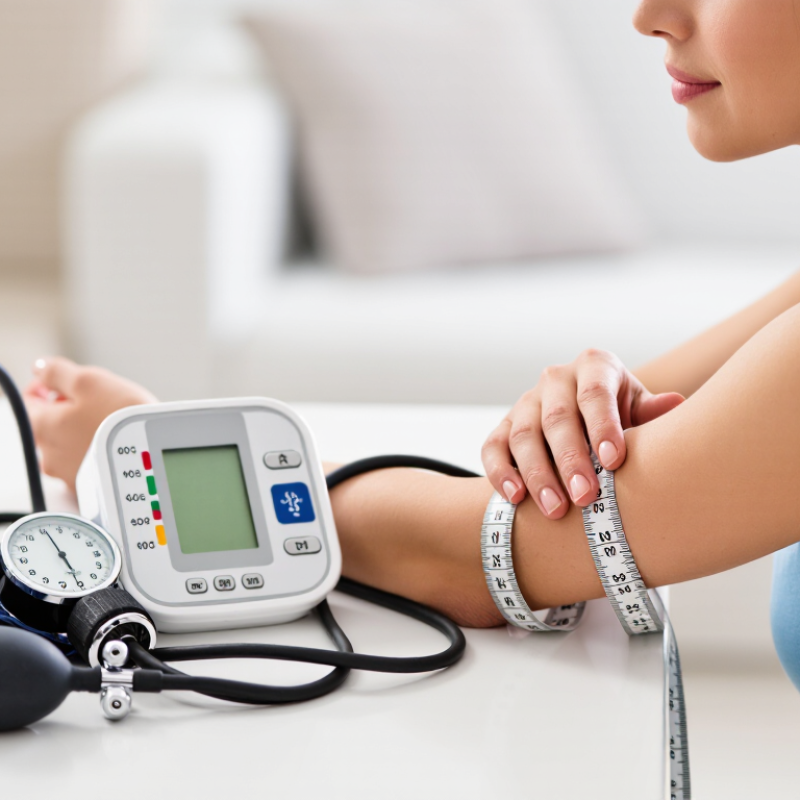
A cuff that looks “about right” may still distort a blood pressure reading. Measure around the bare upper arm, midway between shoulder and elbow, and match that circumference to the cuff’s printed range. The American Heart Association’s 2019 scientific statement recommends a bladder width of about 37–50% of arm circumference and a length covering 75–100%. Fit matters.
The effect can be substantial. In a 2023 randomized crossover study of 195 adults, researchers found that using a regular cuff when an extra-large cuff was needed raised systolic readings by an average of 19.5 mm Hg. When a large cuff was needed, the average increase was 4.8 mm Hg. The study, published in JAMA Internal Medicine, shows why a seemingly plausible number can still mislead. Small cuff, big error.
At home, check the size range printed on the cuff before taking a reading. Keep the arm supported at heart level, with the cuff against bare skin; clothing can interfere with fit. Take two readings about a minute apart, especially if the first seems unusual. Cuff sizing is easy to overlook. It also cannot correct every problem, such as an unsupported arm or a rushed measurement, so keep the setup consistent and discuss repeated unexpected readings with a health professional.
How to Choose Blood Pressure Monitor Cuff Size in 2026
How to Measure Your Arm Before Choosing a Cuff
Measure your bare upper arm before selecting a cuff. Find the midpoint between your shoulder tip and elbow, then wrap a flexible tape around that spot. Keep your arm relaxed at your side and the tape level. It should touch your skin without squeezing or leaving a mark. Write down the measurement in centimeters or inches.
Repeat the measurement once to check it. A small detail, but easy to overlook. Compare your result with the arm-circumference range printed on the cuff or in the monitor’s instructions. Your measurement should fall within that range. Don’t choose by “small,” “regular,” or “large” labels alone; sizing can differ between devices. A cuff that does not fit properly may affect the reading. If your measurement sits near a range boundary, check the instructions or ask a healthcare professional which size to use.
Tips: Measure without a sleeve underneath. Keep the tape snug, not tight. If you get different results, pause and measure again. Keep it simple. Follow your monitor’s instructions for placement and posture each time you take a reading.
| Cuff category | Arm circumference | How to use this range |
|---|---|---|
| Small adult | 22–26 cm (8.7–10.2 in) | Choose only if your measured arm circumference falls within the cuff’s printed range. |
| Adult | 27–34 cm (10.6–13.4 in) | A common standard range; do not assume it fits every adult arm. |
| Large adult | 35–44 cm (13.8–17.3 in) | Use a cuff specifically labeled for this circumference range. |
| Extra-large adult | 45–52 cm (17.7–20.5 in) | Check that the monitor is approved for this cuff size and arm range. |
| Step | What to do | Measurement tip |
|---|---|---|
| 1. Prepare | Expose your upper arm and let it rest relaxed at your side. | Measure on bare skin, not over clothing. |
| 2. Find the midpoint | Locate the halfway point between the shoulder and the elbow. | This is generally where the cuff is positioned on the upper arm. |
| 3. Measure circumference | Wrap a flexible, non-stretch measuring tape around the midpoint. | Keep the tape level and snug without pressing it into the skin. |
| 4. Match the cuff | Compare your measurement with the range printed on the cuff or in the monitor instructions. | If your measurement falls outside the stated range, select a compatible cuff that includes it. |
Important: Cuff ranges vary between monitors, so the range printed by the monitor’s manufacturer takes priority over this reference table. An incorrectly sized cuff can affect blood pressure readings. For a proper fit, the cuff’s bladder should be designed to suit the arm circumference specified for that cuff.
Measure your bare upper arm halfway between your shoulder and elbow, keeping the tape snug but not tight. Write down the circumference in centimeters, then compare it with the exact size range printed on the monitor’s cuff instructions. Do not choose by “small” or “large” alone; ranges differ between devices. A cuff that barely fits may still be the wrong size.
The fit affects the result. In a 2023 randomized crossover trial of 195 adults, using a regular cuff when an extra-large cuff was needed raised systolic readings by an average of 19.5 mm Hg. The study appeared in JAMA Internal Medicine. That difference is hard to ignore. The American Heart Association also advises using a properly sized upper-arm cuff for home measurements. If your arm falls between listed ranges, check the monitor’s instructions or ask a healthcare professional rather than guessing.
Tips: Keep your arm relaxed at heart level, with the cuff against bare skin. Check that its index marker falls within the stated range, if provided. Re-measure if the tape slips or your arm is flexed. It’s an easy detail to overlook, even when the device seems straightforward.
Measure the midpoint of your bare upper arm with a flexible tape, keeping it level and snug. Compare that number with the cuff’s printed range, not just its small, regular, or large label. The American Heart Association’s 2019 scientific statement recommends a bladder length of 75–100% of arm circumference and width of 37–50%. Close enough? Not always. In a 2023 randomized trial reported in JAMA Internal Medicine, using a regular cuff when an extra-large cuff was needed raised systolic readings by about 19.5 mm Hg on average. A cuff that is too small can distort results, too. I have found that a loose tape measurement is easy to repeat; a wrong reading may be harder to notice.
Check the monitor’s manual for the exact arm-circumference range and approved cuff connections. Cuffs are not automatically interchangeable, even when the connector looks similar. Confirm the monitor model has been independently validated, using a registry such as STRIDE BP, and verify that the listing covers your specific device. Sit quietly for five minutes, support your arm at heart level, and place the cuff on skin. The lower edge should sit just above the elbow crease; the tubing should follow the arm as instructed. If the cuff slides, pinches, or leaves a deep mark, pause and recheck the fit. Home technique is imperfect. Record repeated readings and ask a clinician to review persistent differences or an uncertain fit.
When your arm measurement falls between cuff sizes, do not guess from the number alone. Measure around your bare upper arm, midway between shoulder and elbow, with your arm relaxed. Keep the tape level and snug, but do not press it into your skin. Repeat the measurement; a small difference can happen if the tape shifts. Compare your result with the cuff range listed in the monitor instructions.
If your measurement sits on a size boundary, check the device instructions before choosing. Cuff sizes are not interchangeable, and a cuff that is too small or too large can affect readings. If the instructions allow an overlap, use a cuff whose stated range includes your measurement. If neither size fits, ask a pharmacist or healthcare professional to check the cuff and monitor setup. A precise-looking number still depends on a proper fit.
Tips: Sit quietly for five minutes, keep both feet flat, and support your arm at heart level. Put the cuff on bare skin, following the placement guide. Avoid rolling a tight sleeve under it. It is easy to rush this step; remeasure if the tape slipped. Bring your monitor to a clinic visit so staff can check its readings.
Compare your measured upper-arm circumference with the typical adult cuff ranges below. Cuff sizing varies by device, so always check the range printed on the specific cuff.
If your measurement falls between sizes: Remeasure around the midpoint of your bare upper arm, then use a cuff whose stated range includes that measurement. If neither cuff covers it, choose a monitor with a cuff that does rather than guessing between sizes.
Measure around your bare upper arm, halfway between your shoulder tip and elbow. Keep your arm relaxed.
Keep it level and snug against your skin, but do not squeeze or leave a mark. Easy to rush.
Yes. Repeat the measurement and compare the results. If they differ, pause and try again.
Match your arm circumference to the exact range in the cuff instructions. Size labels alone can vary between devices.
Don’t guess. Check the monitor instructions or ask a healthcare professional which cuff size to use.
Yes. A cuff that is too small or too large may affect the result. Fit matters.
Place it on bare skin and follow the monitor’s instructions. If there is an index marker, check that it falls within the stated range.
Keep your arm relaxed and supported at heart level. Follow the same placement and posture each time. A small detail, but easy to forget.
Choosing the correct cuff size is essential for reliable blood pressure readings. A cuff that is too small or too large can produce misleading results, so begin by measuring the circumference of your upper arm with a flexible tape. Measure around the midpoint between your shoulder and elbow, keeping the tape snug but not tight. Then compare your measurement with the size range printed on the monitor’s cuff or in its instructions. This simple process explains how to choose the right cuff size for blood pressure monitor use and helps you select a cuff designed to fit your arm.
After choosing a size, check that the cuff sits smoothly on your upper arm, with its lower edge positioned as directed by the device instructions. Make sure it closes securely without pinching or slipping, and confirm that it is compatible with your monitor. If your measurement falls between two listed sizes, follow the device’s guidance rather than guessing; a cuff whose stated range includes your measurement is generally the appropriate choice. When in doubt, ask a healthcare professional to help check the fit.