MaxPro Medical MaxPro Medical

2026 Top Guide How Often Should You Change CGM Sensors?

Time:2026-10-05 Author:Mason
0%

Changing a continuous glucose monitor is not simply a calendar task. It is a safety and accuracy decision. Many readers ask, “how often should you change continuous glucose monitor sensors?” The most reliable answer depends on the device, approved wear period, skin condition, and your healthcare plan. Manufacturers may specify different replacement schedules, often ranging from several days to two weeks.

A sensor can look secure while its readings become less dependable. Watch for repeated signal loss, unusual readings, lifting adhesive, bleeding, swelling, or persistent skin irritation. A warm shower, sweaty workout, or loose clothing can affect the adhesive edge. Record these details in your glucose app or a small notebook. That record can help your clinician identify patterns.

This guide explains how to check your sensor’s official wear time and recognize problems before they disrupt your routine. It also separates normal end-of-session alerts from signs requiring earlier replacement. Do not extend sensor use beyond the manufacturer’s instructions without professional guidance. A cheaper or more convenient choice may not be the safer one.

Real-world experience is not always neat. Some sensors last comfortably until the final hour. Others loosen early, even with careful preparation. That inconsistency deserves attention, not blame. When readings conflict with symptoms, confirm glucose using the method recommended by your care team. Then seek clinical advice when results remain confusing, symptoms worsen, or the sensor repeatedly fails.
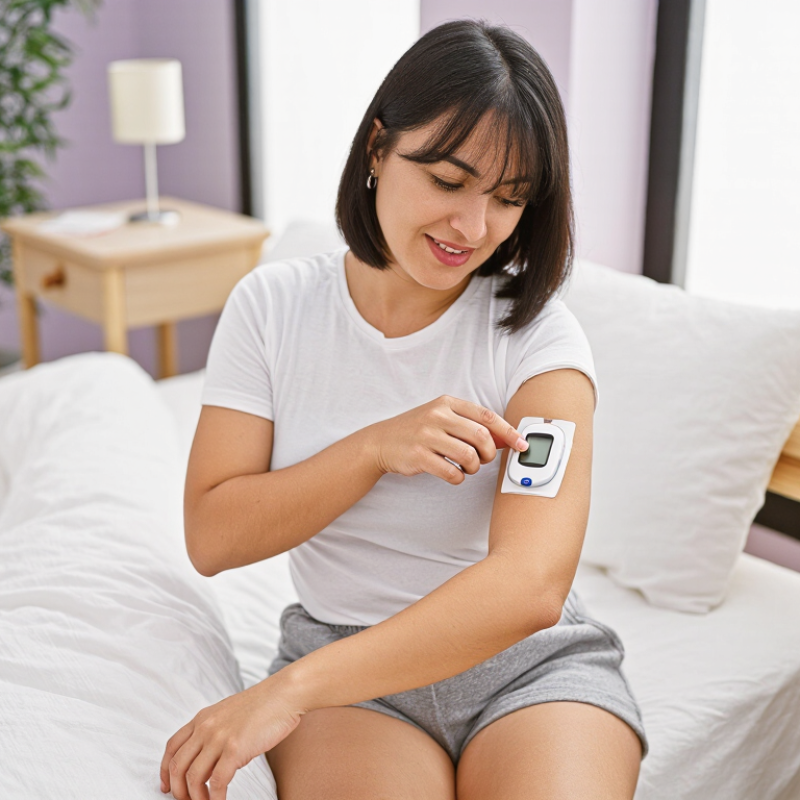
2026 Top Guide How Often Should You Change CGM Sensors?

What a CGM Sensor Measures and Why Replacement Timing Matters

What a CGM Sensor Measures and Why Replacement Timing Matters

A continuous glucose monitor measures glucose in interstitial fluid beneath the skin, not directly from blood. This reading usually follows blood glucose by several minutes. Meals, exercise, insulin, stress, and dehydration can widen that difference. The number on the screen is useful, but it is not a perfect photograph of your blood glucose.

Most sensors are designed for a specific wear period, often between seven and fourteen days. Replacement timing depends on the device instructions, insertion site, skin condition, and sensor performance. A sensor may loosen early after sweating, swimming, or repeated friction from clothing. It may also show unstable readings near the end of its approved use. Do not extend wear beyond the stated period unless a qualified healthcare professional gives clear guidance.

Check the sensor more carefully when readings seem unusual. A sudden low value without symptoms, or a sharp change after pressure on the sensor, deserves attention. Confirming an unexpected result with a blood glucose meter may be appropriate, especially before making treatment decisions. Seek medical advice for repeated errors, severe symptoms, or readings that do not match how you feel.

Replacement schedules are easy to treat as fixed rules. They are not. Personal routines, skin reactions, and technical alerts can change the practical experience. I would not ignore a pattern simply because the calendar says the sensor still has time. Reliable monitoring requires both the data and thoughtful judgment.

Standard Replacement Schedules for Major CGM Sensor Types

CGM sensor replacement depends on its approved wear period, not on comfort alone. Short-wear disposable sensors commonly last 7 to 10 days. Extended disposable sensors often last 14 to 15 days. Some professional-use sensors are worn for about 10 to 14 days under clinical guidance. Implantable sensors may remain in place for several months, but a trained clinician must replace them.

Check the sensor package and insertion instructions carefully. The same-looking sensor may have a different replacement schedule. Do not extend wear after the stated end time, even when readings seem stable. A loose patch, repeated signal loss, skin irritation, or unexplained readings can require earlier removal. Keep backup testing supplies nearby.

Practical experience shows that timing matters during travel, illness, and exercise. A sensor ending overnight can create avoidable gaps. I once treated the expiration alert as a minor reminder; that was poor planning. Glucose readings can also become less reliable when symptoms do not match the display. Confirm unexpected results using an approved method and follow medical advice. Never restart or reuse a sensor unless the manufacturer and healthcare professional specifically permit it.

How to Tell When a CGM Sensor Needs Early Replacement

How Often Should You Change CGM Sensors?

Most CGM sensors should be changed according to their approved wear period. That period varies by device and prescription. Do not extend use because readings still appear normal. The 2019 International Consensus on Time in Range recommends at least 14 days of data, with 70% active sensor time, for meaningful pattern review. Missing data can distort decisions. A practical rule helps, but it is not perfect.

Early replacement may be needed when readings repeatedly conflict with symptoms or a meter check. Watch for sudden gaps, unusual jumps, repeated error messages, loose adhesive, bleeding, swelling, or increasing skin pain. A sensor that peels after sweating may also lose reliability. The American Diabetes Association’s Standards of Care support CGM use when it improves safe glucose management, but users still need clinical judgment. Not every strange number means failure. Still, persistent mismatch deserves attention.

Tips: Keep a simple log with the time, reading, symptoms, and sensor condition. Confirm unexpected values with an approved backup method when available. If you feel shaky, confused, severely thirsty, or unusually sleepy, follow your personal care plan rather than trusting one questionable reading. Contact your healthcare professional or the sensor provider about early replacement. Keep the faulty sensor and packaging if requested. I sometimes want a quick answer, but patterns are stronger than one isolated number.

Steps for Safely Removing and Applying a New CGM Sensor

How Often Should You Change CGM Sensors?

CGM sensor replacement timing depends on the device instructions and your healthcare professional’s advice. Never extend the wear period because the sensor still appears comfortable. Before removal, wash and dry your hands. Check the skin around the sensor for redness, swelling, warmth, or drainage. If irritation appears, contact a healthcare professional before applying another sensor there.

Remove the old sensor slowly. Loosen the adhesive edge, then pull the sensor back over the skin rather than straight upward. This can reduce skin stress. Stop if you notice significant pain or bleeding. Use only a skin-safe adhesive remover recommended for medical use. Clean any residue gently, and avoid scraping the skin. A small adhesive piece can be stubborn.

Tips: Choose a clean, dry site approved in your instructions, and rotate locations each time. Avoid cuts, scars, irritated areas, and places pressed by tight clothing. Let the skin dry completely after cleaning. Do not apply lotion beneath the adhesive. Press the new sensor firmly, then activate it exactly as directed. Keep the applicator steady. If readings conflict with your symptoms, check using an approved backup method and seek medical guidance. I sometimes underestimate how much careful placement matters; rushing can cause early loosening or unreliable readings.

2026 Top Guide: How Often Should You Change CGM Sensors? — Steps for Safely Removing and Applying a New CGM Sensor

No. Guide Area Typical Timing Evidence-Based Guidance Important Safety Point
1 Standard sensor replacement Usually every 7–14 days Wear time depends on the specific CGM system. Approved sensor wear periods commonly range from 7 to 14 days, while some systems specify a different approved duration, such as 10 or 15 days. Use the replacement schedule in the current instructions for your exact sensor. Do not extend wear beyond the approved duration unless the system specifically permits it.
2 Check the expiration date Before opening the package Confirm that the sensor package is sealed, undamaged, and within its expiration date. Gather the applicator, receiver or compatible display device, skin-preparation supplies, and disposal container. Do not use a sensor from a damaged, wet, opened, or expired package.
3 Choose a new site Before removal or application Select only an approved body area. Choose clean, dry, intact skin with enough subcutaneous tissue. Rotate sites to reduce repeated pressure and skin irritation. Avoid scars, wounds, rashes, bruises, areas with infection, heavy hair, waistbands, and places that will be compressed during sleep or exercise.
4 Wash and dry hands Immediately before handling Wash hands with soap and water, then dry them thoroughly. Clean the selected skin area according to the sensor instructions and allow it to air-dry completely. Moisture, oils, lotion, and sunscreen can reduce adhesion and increase the chance of the sensor lifting.
5 Remove the old sensor At the scheduled end of wear Turn off or end the sensor session if required by the system. Lift the adhesive slowly from one edge while supporting the skin. Use adhesive-removal products only if they are compatible with the sensor and your skin. Stop and seek clinical advice if there is significant bleeding, severe pain, spreading redness, warmth, swelling, pus, or a worsening rash.
6 Inspect the removed site Immediately after removal Check the skin for redness, swelling, broken skin, blisters, or retained adhesive. Mild, temporary adhesive marks can occur, but the area should gradually improve after removal. Do not place a new sensor on irritated or damaged skin. Follow medical advice for persistent or worsening skin reactions.
7 Prepare the new sensor At the new application site Open the package only when ready. Assemble and activate the applicator exactly as directed. Keep the applicator sterile and avoid touching the sensor filament or adhesive surface. Never reuse a single-use applicator or attempt to reinsert a removed sensor unless the official instructions specifically allow it.
8 Apply the new sensor After the skin is fully dry Position the applicator on the approved site, apply it using the instructed technique, and press the adhesive firmly around the sensor. Complete pairing or startup using the compatible display device. Do not press directly on the insertion point more than instructed. Follow the system-specific warm-up and startup directions.
9 Secure the adhesive After application and during wear If permitted by the instructions, use an overlay patch or approved adhesive aid before the edges begin to lift. Keep the site clean and dry and check the adhesive regularly. Do not cover the sensor in a way that blocks required access, interferes with readings, or causes skin irritation.
10 Replace early when necessary Any time during the wear period Replacement may be needed if the sensor falls off, fails to start, repeatedly gives error messages, becomes damaged, or cannot provide reliable readings after following troubleshooting steps. Contact the device supplier or clinician about replacement support. Keep a record of the sensor issue and its date.
11 Confirm readings safely Whenever readings seem unusual Use a blood glucose meter when CGM readings do not match symptoms, the sensor is warming up, readings are unavailable, or treatment decisions require confirmation under your care plan. Treat symptoms of severe low or high blood glucose promptly according to your medical plan, even if the displayed CGM value appears normal.
12 Dispose of used parts After removal Place the used sensor and applicator in a puncture-resistant container when they contain a needle or sharp component. Follow local regulations and the system instructions for disposal. Keep used sensors and sharps away from children, pets, and anyone who could be injured.

Clinical reminder: Sensor wear duration, approved insertion sites, warm-up time, and replacement procedures vary by CGM system and region. Always follow the current product instructions and the advice of your healthcare professional.

Factors That Can Change Your Personal Sensor Replacement Schedule

2026 Top Guide: How Often Should You Change CGM Sensors?
Factors That Can Change Your Personal Sensor Replacement Schedule

Your personal replacement schedule depends on more than the calendar. Follow the sensor’s approved wear period, even when readings seem stable. Extending use may cause inaccurate data, skin irritation, or unexpected signal loss. A qualified clinician or diabetes educator can explain your device instructions and glucose patterns. My practical rule is simple: treat the labeled duration as a boundary, not a suggestion.

Sweat, swimming, frequent showers, and loose adhesive can shorten reliable wear. A lifted sensor may collect moisture and cause uncomfortable rubbing. Check the site after exercise and before sleep. If it becomes painful, red, swollen, or unusually warm, follow removal instructions and seek medical advice. Do not rely on questionable readings when symptoms and data disagree. Confirm them with an approved backup method if your care plan recommends one.

Skin sensitivity also affects timing. Rotating sites allows irritated skin to recover. Shaving or harsh cleansing may worsen adhesion. Illness, dehydration, rapid glucose changes, and sleeping pressure can affect readings. Keep a short log with insertion dates, skin condition, alarms, and signal gaps. I used to blame the sensor too quickly. Placement and pressure were sometimes the real issue. Review that record with a qualified professional before changing your routine.

FAQS

How often should a CGM sensor be replaced?

Replace it according to the approved wear period and your healthcare professional’s advice. Do not extend use because readings still look normal. Treat the labeled duration as a boundary.

What signs may mean early replacement is needed?

Consider early replacement when readings repeatedly conflict with symptoms or an approved backup check. Signal gaps, repeated error messages, loose adhesive, bleeding, swelling, or increasing pain also matter. One odd number is not always sensor failure.

What should I do when readings and symptoms disagree?

Follow your personal care plan instead of trusting one questionable reading. Confirm unexpected results with an approved backup method when recommended. Seek medical guidance if the mismatch continues.

Which symptoms require urgent attention?

Shakiness, confusion, severe thirst, or unusual sleepiness should not be ignored. Follow your care plan promptly. Do not wait for one uncertain reading to become clearer.

How can I safely remove an old sensor?

Wash and dry your hands first. Loosen the adhesive edge, then pull the sensor back across the skin. Stop if significant pain or bleeding occurs. Avoid scraping stubborn adhesive.

How should I prepare skin for a new sensor?

Choose a clean, dry site approved by the instructions. Avoid cuts, scars, irritated areas, and spots pressed by tight clothing. Let the skin dry completely. Do not apply lotion underneath.

Can exercise, water, or sleep affect sensor reliability?

Sweat, swimming, frequent showers, and sleeping pressure can loosen adhesive or disturb readings. Check the site after exercise and before sleep. A peeling edge deserves attention.

How can I understand my personal replacement pattern?

Keep a short log with insertion dates, readings, symptoms, alarms, signal gaps, and skin condition. Review repeated patterns with a qualified professional. I sometimes blame the sensor too quickly. Placement or pressure may be the real problem.

Conclusion

A continuous glucose monitor (CGM) sensor measures glucose levels in the fluid beneath the skin and sends readings to a compatible device, helping users identify trends and make informed daily decisions. Understanding how often should you change continuous glucose monitor sensors is important because sensors are designed for a specific wear period. Replacement schedules can vary by sensor type, but most require changing after a set number of days. Following the approved wear time helps support accurate readings and reliable performance.

A sensor may need early replacement if readings seem consistently inaccurate, the adhesive loosens, the site becomes irritated, or the device stops communicating properly. Before applying a new sensor, wash and dry your hands, remove the old sensor carefully, inspect the skin, and choose a suitable new site according to the instructions provided with the device. Personal replacement timing may also be affected by skin sensitivity, sweating, exercise, environmental conditions, and sensor adhesion. When uncertain, consult a qualified healthcare professional.

Mason

Mason

Mason is a seasoned marketing professional with a deep expertise in the company's offerings and a passion for driving brand awareness. With a strong background in digital marketing strategies, he has an innate ability to connect with diverse audiences and effectively communicate product benefits.......